Traffic Simulator
In the particle system demo, we saw how independent particles can be simulated on the GPU in real-time, according to some set of laws. But what if the problem requires some interaction between objects? If the interaction is limited spatially, such as for a collision system, it can often be achieved in real-time by discretizing space and having each object record its presence and state into the portion of space where it lies in that moment.
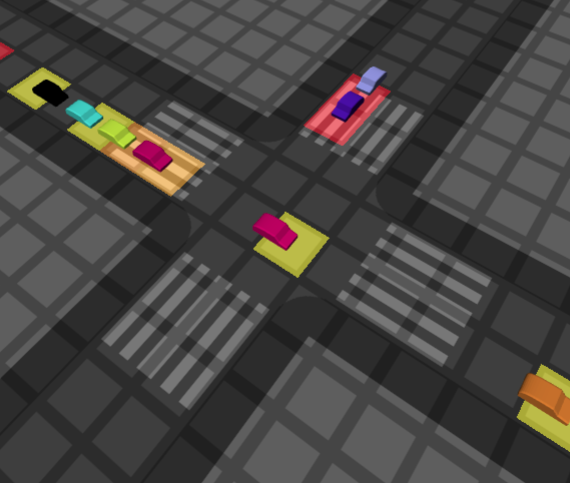
The same computation code can also be used for other things than particles. In this demo, our "particles" are little cars, moving around on a city grid. The position and velocity of the cars are updated just like for a particle system, but in the final render pass, instead of a cluster of points, we render an instanced mesh so that each instance has its own transformation and colour.
[Blog entry in progress]
Simulation on the GPU
Although the traffic simulation itself is highly simplified, the point of this challenge was to make the simulation run completely on the GPU, in WebGL which has very limited tools for general computation. To run in real-time, each car cannot check every other car in the scene as this would be too expensive. A classical solution to this could be a spatial tree structure, but it is not practical with the limited tooling in WebGL as we want the number of cars to scale to hundreds of thousands or more.
Instead, we use a grid state, where we divide up the plane into a grid of roughly car-sized cells, and have each car continuously store information about its presence into the cell on which it stands. This is achieved by rendering the cars as points on a very low-resolution render target, where each pixel corresponds to a cell. We can encode the information we need into color of the point. For this demo, we encode information as follows:
After the grid state pass has been rendered, we run a compute pass where each car can read the grid state to check the cells in its surroundings. It can also read the output from the previous compute pass to learn its own current position and velocity. From this information, they can see the positions and velocities of nearby cars and make simple driving decisions accordingly.
Then, in a third and final render pass, we use instancing to render cars with simple, identical geometry. We assign a random colour to each instance. In the vertex shader, each car can look up its position and velocity (by instance ID) from the compute pass output and render itself correctly. The final result is a system that can effortlessly be scaled up to very large city grids while retaining rendering performance.
[Blog entry in progress]